

My experience making pasta dough in culinary school wasn't very pretty. I was under an impeccable amount of pressure and I really didn't understand the concept of making fresh pasta. I had always thought I was a student of visual, but it was not until my time after culinary school where I became a student of both visual and research. My externship was spent working for a huge television production company, where I spent my time working with producers in pre-production for cooking shows. My job was to research talking points for these shows, as in why they would use ingredients, the facts and the reasoning behind everything in the recipe, and why a recipe works or why it doesn't work. Having gained the basic concepts and fundamentals in culinary school, I was now beginning to understand why and able to apply my knowledge to action. Flash back to my final exams when I made fresh fettuccine and it came out mushy. I thought I had made a perfect pasta dough! Turns out I did not, and here is why...
The first and foremost thing you need to know are the ingredients used in fresh pasta dough. There is a substantial difference in fresh pasta to store-bought dry pasta. Store-bought pasta is made from the combination of semolina flour and water, where as Fresh pasta dough is made of the combination of flour and water, and the water is usually provided through the use of eggs (the whites in eggs are made up of 90% water). So, there is your difference, one is made up of eggs and the other is not.
Knowing the difference between each type of flour is also extremely important. Semolina flour is the highest in gluten and it is made from durum wheat, which is the hardest type of wheat grown. Semolina adds a heartiness and a rougher texture to the noodles that help sauces cling better."00" flour is also high in gluten. It is finely milled, resulting in a powdery texture. This can yield even silkier noodles than other flours. Some people like to make noodles using both semolina and "00" flour. You get the best of both worlds! However, if you are inexperienced in making noodles, I would recommend using the good ole handy dandy, located in your pantry, all-purpose flour! All-purpose flour is a blend of hard and soft wheat. It may come in bleached or unbleached form, and basically it is what is readily available. Unbleached is the form I usually use, because it is bleached naturally not chemically (like bleached is).

What's next you ask? Eggs! Eggs! Eggs! This is an element that is not included in store-bought dry noodles. Fresh pasta is praised for its eggy flavor and yellow hue! The more egg yolks you use, the more yellow your noodles will be. Yellow noodles are made with a combination of whole eggs and egg yolks. Whiter noodles can be made up of either egg whites or whole eggs (no so much just egg yolks). I prefer to use two eggs yolks to every whole egg used.

The last and most debated ingredient that is important when making pasta dough is salt! Adding salt creates an even better flavor to the dough. I like to use kosher salt, but you can use iodized salt as well. I just would not recommend using sea salt, because it prevents the dough from developing a silky-smooth texture. And, so there you have it! The best possible option of ingredients to easily create a fresh pasta dough: AP flour, whole eggs, egg yolks, and kosher salt.

Now, here is where I made the crucial mistake in culinary school, I used olive oil. A lot of my chef teachers actually instructed us to do this. Adding olive oil can make the dough soft and mushy, resulting in less elastic noodles. It also makes it extremely challenging to mix and knead the dough with this addition. Do yourself a favor and stay away from olive oil. If you want to add that particular flavor to your pasta, put some olive oil in your boiling water when cooking. The only time you should use olive oil when cooking pasta is for fresh pasta, and that is because eggs are used and can sometimes stick together when boiling. This does not apply to store-bought dry pasta (because they do not use eggs.) Get it? Got it? Good!

Or, if you are an American, like I am, that does not have a lot of time on her hands, you can combine all of your ingredients in a food processor or a stand mixer with a hook attachment and mix the dough on low speed until it combines into a ball. Well, that took all about 5 seconds. Now what?

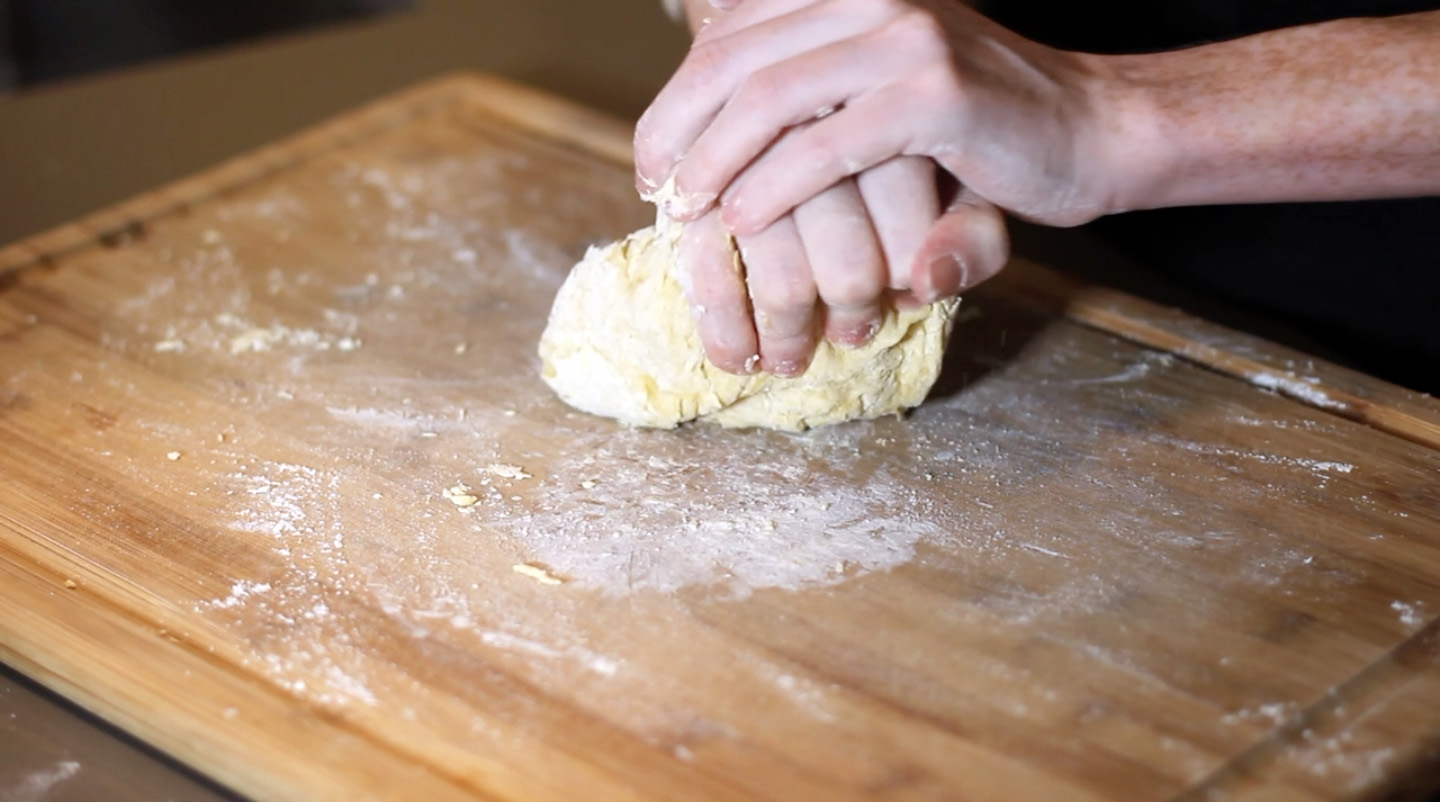
Now we knead. Kneading is the process of working the moistened flour into the dough with the palms of your hands, adding strength, and smoothness to the final product. The perfect amount of time to knead your dough is 10 minutes. Under-kneading won't provide you with the same snappy spring, and the ingredients won't be as well incorporated. Do NOT skip this step and don't cut your time short. 10 minutes is PERFECT.

I would highly recommend getting yourself a pasta maker. Although it is not mandatory, it sure makes your life a heck of a lot of easier! Start by cutting the dough in half (for 2 servings) and cutting it into quarters (for 4 servings). Use either a half or a quarter and wrap the rest of the dough tightly so it does not dry out. Use a rolling pin to roll your dough out slightly so it fits through the first setting of the pasta maker. Setting "1" makes a thicker sheet, whereas setting "7" makes for a much thinner sheet of pasta. Send the dough through setting "1" and setting "2" about one to two times for each setting. It is now time to laminate your dough. The word laminate is a universal word for different uses. It is a technique of manufacturing a material (in this case, pasta dough) in multiple layers, so that the material achieves improved strength, stability, and appearance. In the world of pasta, you are going to fold the dough into a smaller package at this point, roll it out with your rolling pin, and then feed it back through setting "1" one to times times, and then setting "2" one to times times. Repeat. The dough becomes more sturdy and manageable when laminated at least twice. The pasta will have better texture and a more supple bite! Proceed on to send your dough through settings "3" through "6," if you are making a regular noodle. Pass the sheet of pasta through "3" through "7" when making a stuffed pasta shell. Pick an attachment, any attachment, and don't let me see it. Well, you catch my drift. This is the fun part! Send your sheets of pasta through a fettuccine attachment or a spaghetti attachment or proceed on to cut your own thick slices of pappardelle. Aw, hell you can even make raviolis and tortellinis with those beautiful hands of yours. The list goes on and on. Amazon.com offers all sorts of affordable pasta-making tools to help you achieve your vision.


Once you have created that perfect pasta, cook it up! Bring heavily salted water with a splash of olive oil to a boil and cook the fresh pasta for 90 seconds, A.k.a. 1 1/2 minutes. Oh yes, fresh pasta cooks very VERY quickly, so be careful not to overcook it. Cooking times:
Fresh Pasta (no drying or freezing): 1 1/2 minutesFresh Pasta; frozen: 1 1/2 minutes (for raviolis and tortellinis, i like a bit of a bite) and 3 minutes for noodles
Fresh Pasta, air dried: 4 to 6 minutes

If you want to freeze your pasta for another day. Place the uncooked pasta on a sheet pan with parchment paper or a silpat and put it in the freezer for 15 minutes. Then, transfer the pasta into air tight containers or plastic bags and back into the freezer until further use. Want to dry your pasta? Alright, fine. You can purchase a pasta dryer OR you can use plastic hangers to hang dry in a single layer for 12 to 24 hours. Humidity can be your enemy in this case. Make sure the pasta is hung dry in a dry place to avoid molding. Once the pasta is completely dry, transfer noodles to airtight container. I wouldn't recommend doing this for pasta stuffed with cheeses and meat.

Keep Cooking,
Kim
(WILL ATTACH MY RECIPE)
Fun Pasta Things:
Pasta Maker with attachments
Scale to weigh out your flour
Ravioli and bow-tie pasta wheel
Ravioli Maker
Use to make Tortellini, ravioli, or tortelloni
No comments:
Post a Comment